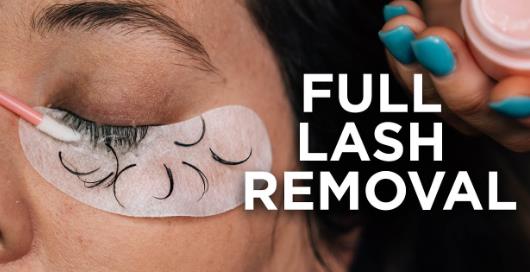
How to Safely Remove Eyelash Extensions

Eyelash extensions can elevate your look, creating a fuller, more voluminous appearance. But, there comes a time when either due to their life span or a change of preference, they need to be removed. While it’s always recommended to have them professionally removed to avoid damage to your natural lashes, if you find yourself unable to visit a salon, here’s a step-by-step guide to removing eyelash extensions at home.
Step 1: Gather Your Supplies
Before beginning the process, ensure that you have all necessary items at hand:
An oil-free eye makeup remover
Cotton pads or rounds
Q-tips
Coconut, olive, or castor oil
Eyelash comb or spoolie brush
Warm water
Mild shampoo, preferably baby shampoo
Step 2: Clean the Eyelashes
Start by removing any makeup from your eyes using an oil-free makeup remover, focusing on the eyelids and avoiding the lashes as much as possible. This will help in revealing the adhesive bonds holding the extensions.
Step 3: Steam Your Face
Steaming your face is a gentle way to loosen the eyelash extensions. Fill a bowl with hot water and place your face over it, covering your head with a towel to trap the steam. Do this for about 10-15 minutes. The steam will help soften the adhesive, making the extensions easier to remove.
Step 4: Apply Oil
Oils can break down the adhesive used for lash extensions. Dip a Q-tip in coconut, olive, or castor oil and gently rub it along the lash line. Be cautious to avoid any contact with your eyes. Let the oil sit for a few minutes to allow it to penetrate the adhesive.
Step 5: Gently Remove the Extensions
After letting the oil sit, use your eyelash comb or a spoolie brush to gently brush through your lashes. The extensions should start sliding off. Be gentle and take your time. If any extensions are stubborn, reapply oil and try again. Never pull or tug on the extensions as it can damage your natural lashes.
Step 6: Cleanse Your Eyelashes
Once all the extensions are off, wash your eyelashes carefully using mild shampoo diluted with water or a lash shampoo to remove any residual oil and adhesive. Rinse thoroughly with warm water and pat your face dry with a clean towel.
Step 7: Nourish Your Natural Lashes
After removal, it’s important to nourish your natural lashes. Regular application of a lash serum or a nourishing oil like castor or coconut oil can help in strengthening and conditioning your lashes.
Precautions and Tips:
Professional Removal: Whenever possible, opt for professional removal of eyelash extensions. A certified lash technician will use a specialized remover to dissolve the adhesive safely, ensuring no damage to your natural lashes.
Avoid Pulling: Never attempt to pull or tug at your extensions; this could lead to permanent damage to your natural lashes.
Patience is Key: Take your time during the removal process, allowing the oil to thoroughly dissolve the adhesive before trying to remove the extensions.
Avoid Irritants: Keep all products away from the eye itself to avoid irritation and possible eye injury.
Nourish and Hydrate: Regularly apply a lash serum or oil to your natural lashes post-removal to nourish and hydrate them.
Regular Breaks: If you regularly wear eyelash extensions, allow your natural lashes some time to recover between sets.
Remember, maintaining the health of your natural lashes should be your utmost priority when wearing extensions. By following these steps and precautions carefully, you can safely and effectively remove your eyelash extensions at home while preserving the integrity of your natural lashes.
This post was written by Rachel, a professional at Saturn Beauty Co. If you’re all about rocking some dazzling, high-quality lashes, well, darling, you’re at the right place! My name’s Rachel, the passion-driven soul behind Saturn Beauty Co., and I’m here to bring a dash of cosmic charm to your beauty experience. Call me today to book your lash appointment.
